DIY Litter Box Furniture and the Cuts That Decide It
DIY litter box furniture by the numbers [a 24x20x18 interior, an 8-10 inch entry, a 1/4 inch lip] + where the second cut actually goes.

Alfredo RamsesFounder · August 25, 2026 · 24 min read

On this page8 sections
- 1What a Cabinet Actually Has to Fit
- 2Build One, Which Starts With Furniture Somebody Else Already Made
- 3Build Two, From Flat Panels, and What It Buys You
- 4The Two Cuts, and Why the Second One Has a Rule
- 5One Cat, Two Cats, and the Cabinet That Becomes a Bottleneck
- 6Renting, and the Build That Cuts Nothing
- 7What to Do With All of This
- 8Frequently Asked Questions
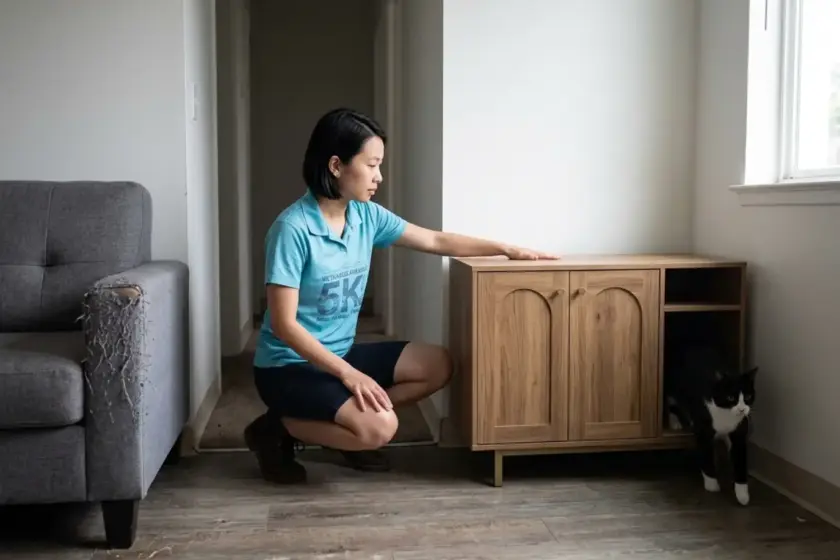
The cabinet is in the corner, the box is inside it, the doors are shut, and the room smells worse than it did when the box sat out in the open. Nothing is wrong with the cabinet. It got cut once, in the one place everybody cuts, and the cat is now walking in and out through the only opening that exists.
A hidden litter box setup lives or dies on two decisions made before any blade touches wood: how big the interior has to be, and where the second cut goes. The numbers below come from cabinet-interior clearances furniture makers publish and DIY tutorials skip, and from one build that is still standing four years and one house move later. Two builds, one no-cut route for renters, and the measuring chain that comes before all three.
Quick Answer
Five things decide whether the build works, and four of them happen before you cut:
- Measure the cat, then the box, then the cabinet interior, in that order
- A standard cat needs about 24 x 20 x 18 inches of interior clearance
- A large-breed cat needs 28 x 22 and a taller entry so he is not ducking
- Cut the entry 8 to 10 inches wide, its bottom edge a quarter inch above the box wall
- Put the second opening on a different plane: back or top, never beside the door
- Renting? The no-cut route is a real build, not a downgrade
What a Cabinet Actually Has to Fit
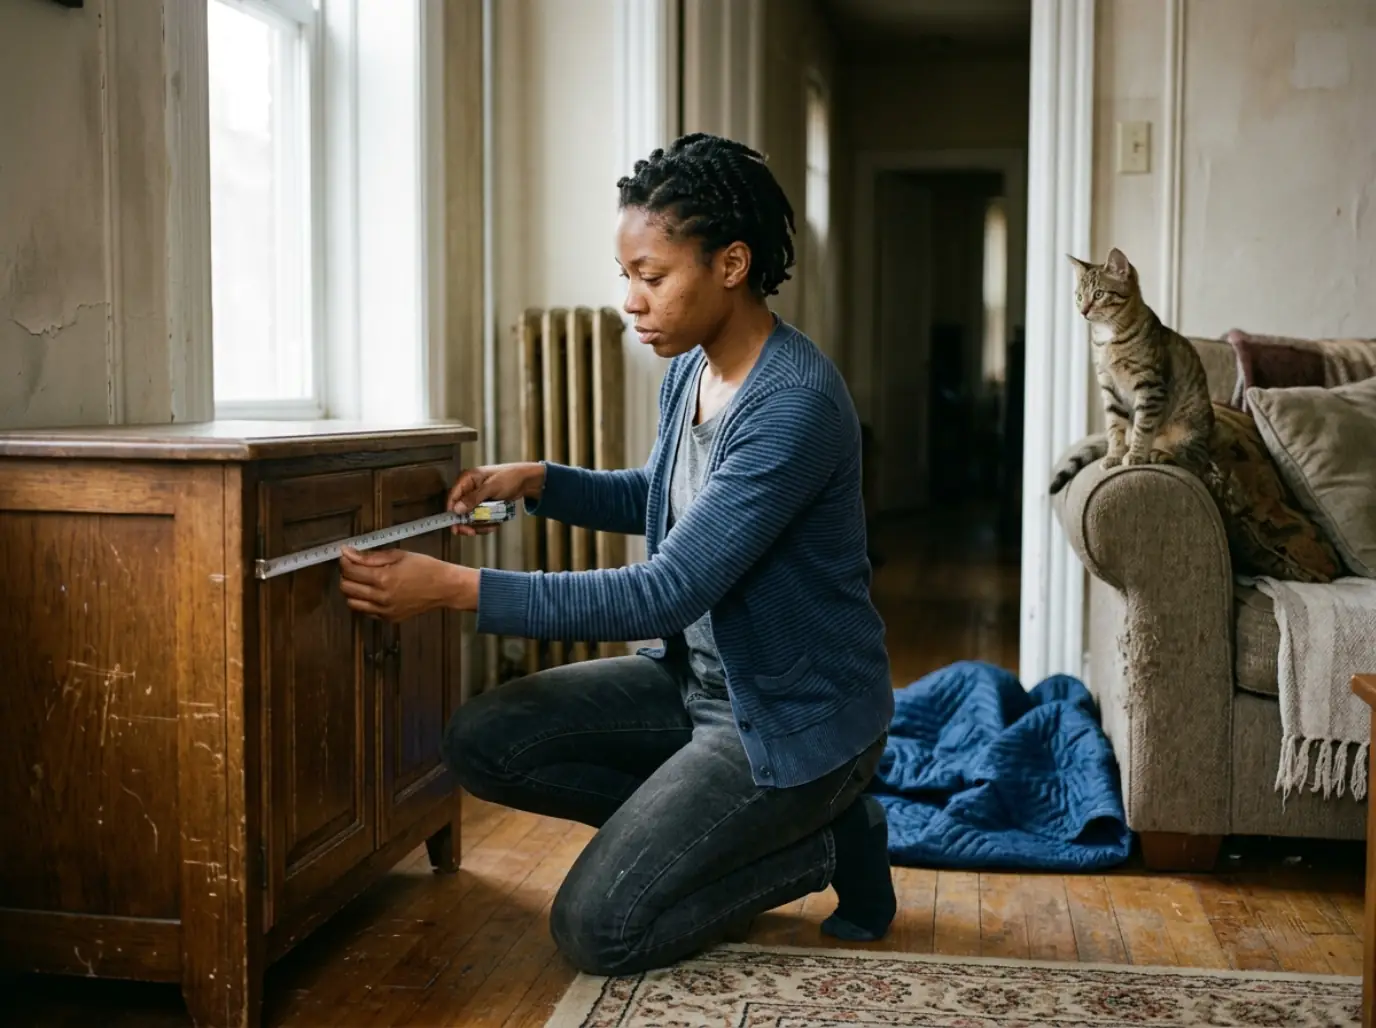
Almost everyone starts at the wrong end of this. You find a cabinet you like, you get it home, and then you find out whether the box fits.
The chain runs the other direction, and getting it backwards is the reason so many finished builds have a cat who turns around in the doorway instead of inside the box. An enclosure is a container for a litter box that already works, which is worth reading first if you are still deciding what an enclosure changes about the box you already have. If the box was wrong before you hid it, the cabinet just makes it wrong and invisible.
Start at the cat, not the cabinet
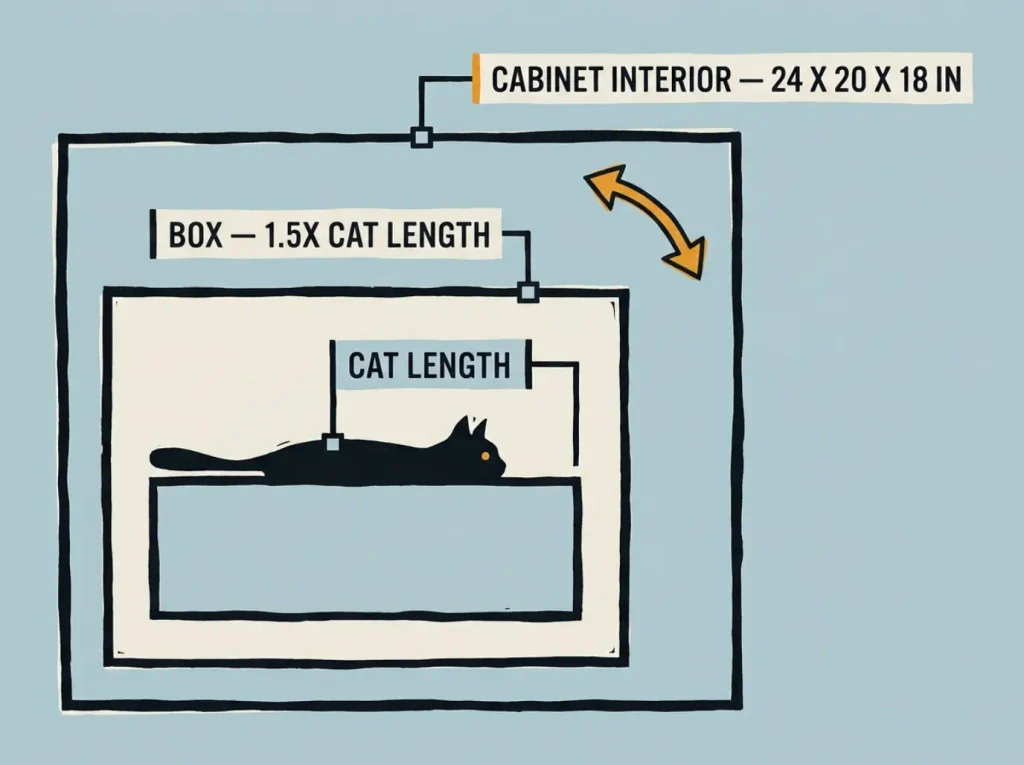
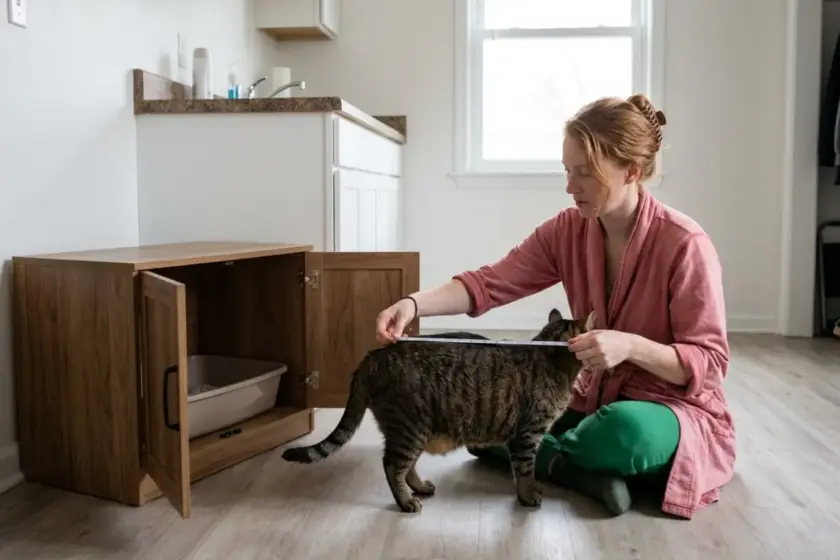
The 1.5x cat length rule starts here: stretch him out and measure from the tip of his nose to the base of his tail. That number is the one every other number in this project comes from. The box should be about 1.5 times that length, which is the standard sizing rule and which quietly rules out most trays sold as large. Then the cabinet interior has to hold that box with room around it, because a cat who cannot turn around inside the box will turn around in the doorway and back in, and the back end of a cat aimed at an 8-inch hole is how litter ends up on your floor.
That is three measurements taken in a fixed order, and each one sets the next. Skip the first and you are sizing a cabinet to a box you chose by guessing. Measure your cat, not a cat.
The interior clearances, in inches
For a standard cat with a standard large box, the working minimum is 24 inches wide by 20 inches deep by 18 inches tall of usable interior. Not the cabinet’s outside dimensions. The inside, measured where the box will actually sit. Height matters more than people expect, because 18 inches is what lets a cat stand fully upright to dig and turn without his spine touching the underside of the top panel.
If you are building around an automatic unit instead of a tray, that width jumps. A self-cleaning box needs a stock cabinet of at least 30 inches wide, not 24, because the unit’s own base is wider than a tray and its lid needs clearance to open. Build to 24 and you will have a very handsome cabinet that the machine does not fit inside.
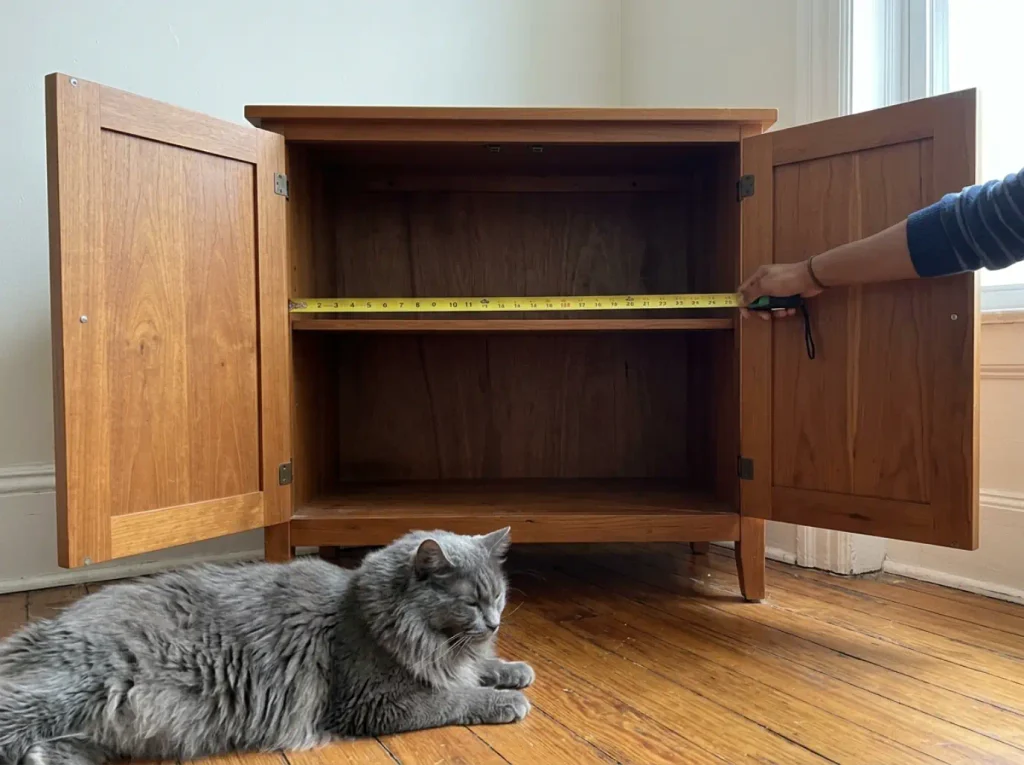
Measure a thrifted cabinet’s interior with the doors closed, not open. Hinges, door frames and the lip they close against eat two to three inches of depth that the outside dimensions never show, and that is exactly the margin you were counting on. Put the tape inside, shut the door onto it, and read the number that survives.
When your cat is bigger than “a cat”
A comment thread on one of the most-shared build posts has a reader asking, very specifically, whether the standard opening will work for her Siberian Forest cat. It is the right question and nobody in the tutorial answered it. Cat clearance scales with the animal: a large-breed cat at 15 pounds or more needs an interior of at least 28 inches wide by 22 inches deep, plus a taller entry so he is not lowering his head every single time he goes in.
A Maine Coon at full stretch is a different animal from the one these plans are drawn around, and long fur adds a problem the numbers do not show: a snug opening drags at the coat every pass, and a cat who gets tugged at the shoulders twice a day will find somewhere that does not tug. He is not being fussy about your carpentry. He is describing a doorway that is too small, which is one of the very few things he can tell you.
One more thing about height, and it is the boring kind that matters. A converted dresser holding a full litter box is heavier and more top-loaded than it looks, and a cat leaning his weight into a door adds a sideways push furniture was never designed for. Anything over the CPSC’s own tip-over threshold — 30 inches or 30 pounds gets anchored. Most dresser-height cabinets clear both.
Build One, Which Starts With Furniture Somebody Else Already Made
The build everybody photographs is the one made from scratch. The build most people actually finish started as somebody’s old entertainment hutch for the price of a pizza.
There are three honest routes here: convert something secondhand, build from flat panels, or skip cutting entirely, and if you decide halfway through that you would rather not own a jigsaw, buying one already built is a legitimate exit. The conversion route is cheaper, faster, and the right answer for most people. Its only real constraint is not money. It is finding one wide enough.
What to look for in a secondhand cabinet
Interior width first, before you look at whether you like it.
Litter box size sets it and nothing else does. Carry a tape measure to the thrift store and check the inside against the numbers above, doors closed. Then check that the doors open all the way flat, because a door that stops partway open turns scooping access into a wrist exercise you will resent by week two. And look at the back panel: a solid back can take a vent cut and hold a screw, while the stapled cardboard on the back of cheap flatpack cannot do either.
An entertainment-hutch base is usually the best shape on the floor. It already has the doors, the footprint and the height, and the interior is one open volume instead of a grid of fixed shelves. You are buying a shape, not a project. Everything else is subtraction.
The tool list, and what you can borrow
The real list from a build still standing four years on: a drill with a 3/4-inch spade drill bit, a jigsaw, 1 1/2-inch trim, a miter saw, liquid nails, clamps, a finish sander, wood filler, chalky paint, clear wax, and drawer pulls. That is the whole thing. Most of it is borrowable or already in somebody’s garage, and the miter saw is genuinely optional if the store cuts your trim.
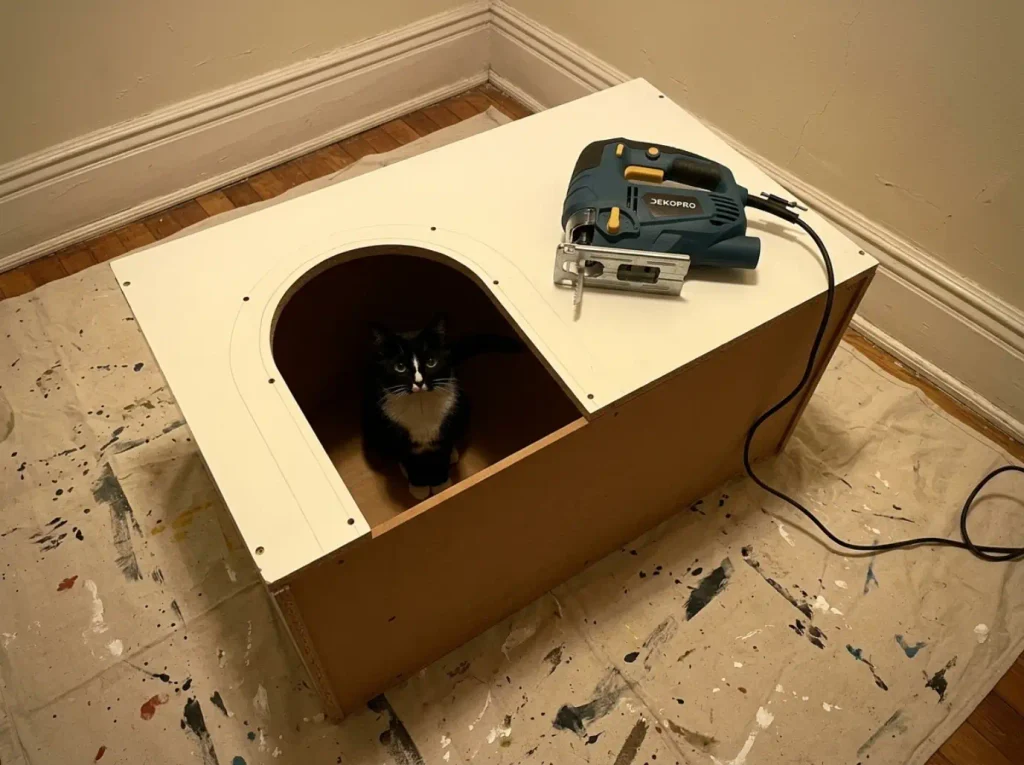
The jigsaw is not optional, and it is the one thing first-timers usually do not own. The DEKOPRO Electric Corded Jigsaw covers both cuts this project needs, with six speeds and a bevel you will never use, and it is corded on purpose: the entry cutout is the one irreversible step in the whole build, and a battery dying two-thirds of the way around an arch is how an opening ends up with a step in it that no amount of sanding hides. If a neighbor has one, borrow it. This is a tool you will use twice on this project and then forget about until the next one.
Pilot holes first, and why hers had to be redone
The builder whose cabinet is still going four years later got this wrong the first time and said so publicly, which is more than most tutorials offer. She dropped a bit into the panel at a random spot to start the cut, and had to go back and redo it because the jigsaw blade had nowhere clean to begin. The fix takes a minute: drill a 3/4-inch hole at each of the four corners of your traced opening, inside the line, then run the jigsaw corner to corner between them, which is what turns a traced shape into a clean cat door cutout.
Those corner holes do two jobs. They give the blade a clean entry, and they set the radius of your corners for you, which is why a hole drilled first looks deliberate and a hole started with a plunge cut looks like an accident you painted over. Do all four before you start cutting anything.
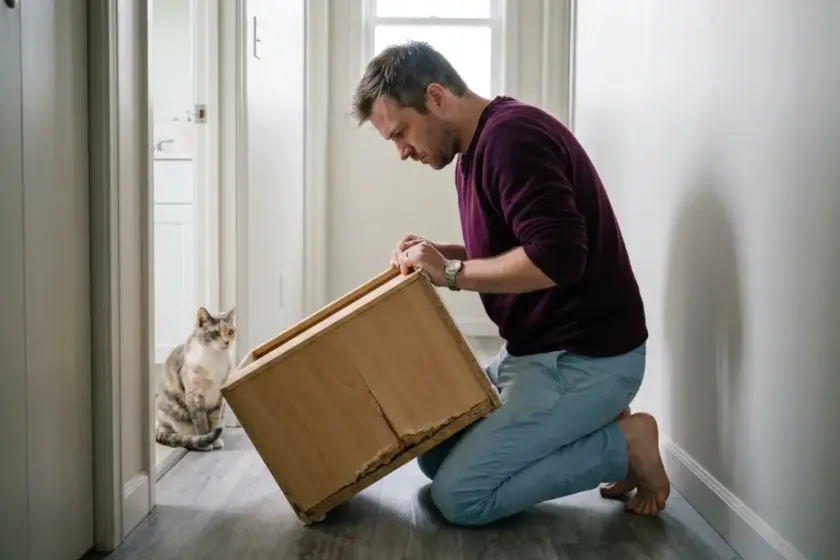
Clamp a scrap board flat against the back face of the panel before the jigsaw goes in. The blade cuts on the upstroke, so it tears out on the side you cannot see, and on veneer or MDF that tear-out is a ragged edge exactly where the cat’s shoulders will pass. The scrap gives the fibers something to press against. It costs nothing and it is the difference between an edge you sand and an edge you fill.
Build Two, From Flat Panels, and What It Buys You
Building from scratch is not the better build. It is the build you do when the secondhand market has nothing in the right width, which happens more often than you would think once you have a specific number in your head. That is a real reason. Wanting to have built it is not one, and I would rather say that plainly than pretend a weekend of panel work is free.
When building from scratch is the right call
Three situations make it the correct answer. Nothing secondhand comes in your width, and you have looked for a month. You need an interior sized to an automatic unit, which pushes you past 30 inches and out of most thrift-store furniture — the documented build of that kind starts with a stock cabinet and dresses it with beadboard filler panels and a plywood top, precisely because nothing on the secondhand market came that wide. Or the cabinet has to live in a wall recess with a dimension that does not negotiate.
Everything else is a conversion waiting to happen. And the cost math is less lopsided than it looks: a from-scratch cabinet sized around a self-cleaning litter box lands well under what the commercial cabinets built for the same footprint ask, which is the one place where building genuinely beats buying on money rather than on fit.
Joining panels without a shop full of tools
Here is the wall most people hit. Joining half-inch to inch-and-a-half panels square and strong usually means a table saw, cut joinery, and a place to keep both. Without that, panels go together with butt joints and screws through the face, which is fine right up until a cat’s weight and a house move take turns with it.
Pocket-hole joinery removes that wall. You drill an angled hole in the back of one panel, drive a screw into the mating piece, and the joint is square, hidden and stronger than anything you were going to manage freehand.
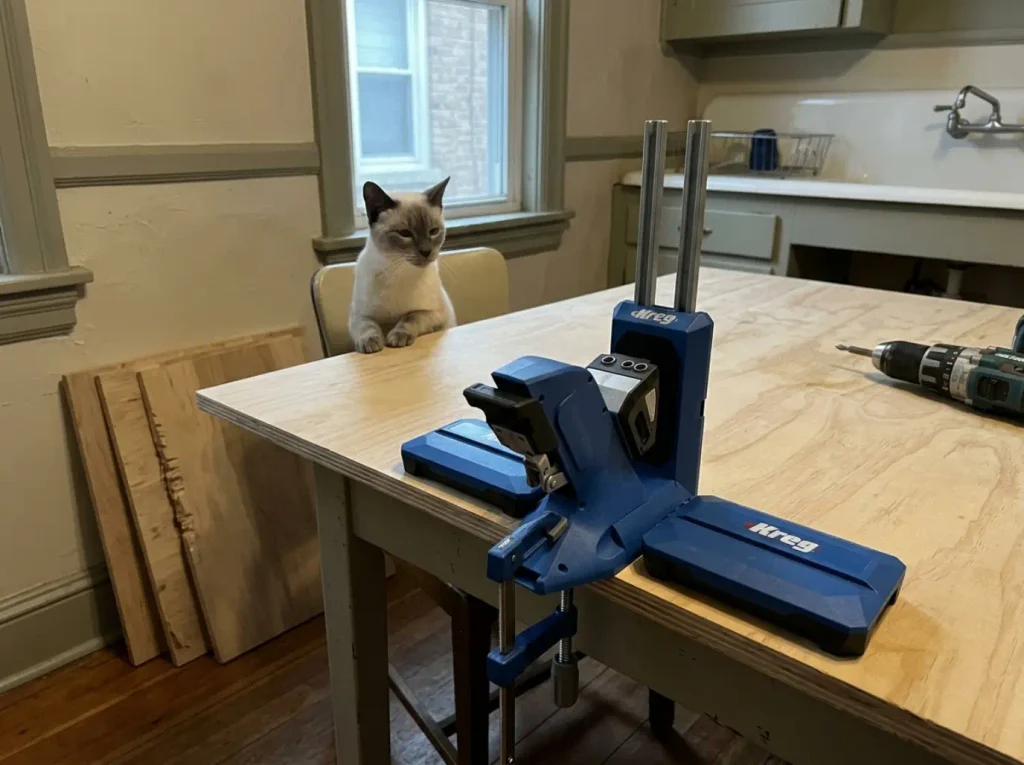
The Kreg Pocket-Hole Jig 720PRO handles the full half-inch to inch-and-a-half range this build uses and clamps to the workpiece so the drilling stays perpendicular, which is the part that goes wrong when people try to freehand it. It is a mid-tier purchase and worth naming the alternative in the same breath: if you do not want to buy a jig for one cabinet, do Build One instead. A converted hutch with a good cut in it is not a lesser object.
Designing the interior first
From-scratch works in the opposite direction from conversion, and this is the part worth stealing even if you never build one. You draw the interior first, from the measuring chain, and the exterior is whatever falls out of it once you add material thickness. It is also where you decide how you will get at the tray in six months: a removable desktop that lifts off, or a slide-out drawer the whole box rides on, both of which buy you deep clean access that a fixed carcass with two small doors never gives you. Conversion forces you to accept an interior somebody else decided; building lets you set it and then discover how big the piece has to be.
Which is also the honest warning. This is a weekend, not an afternoon, and the finish work is most of it. The carcass goes together in a few hours. The filling, sanding the edges, priming, painting and hardware is the other day and a half, and it is the part that decides whether the thing looks like furniture or looks like a box.
The Two Cuts, and Why the Second One Has a Rule
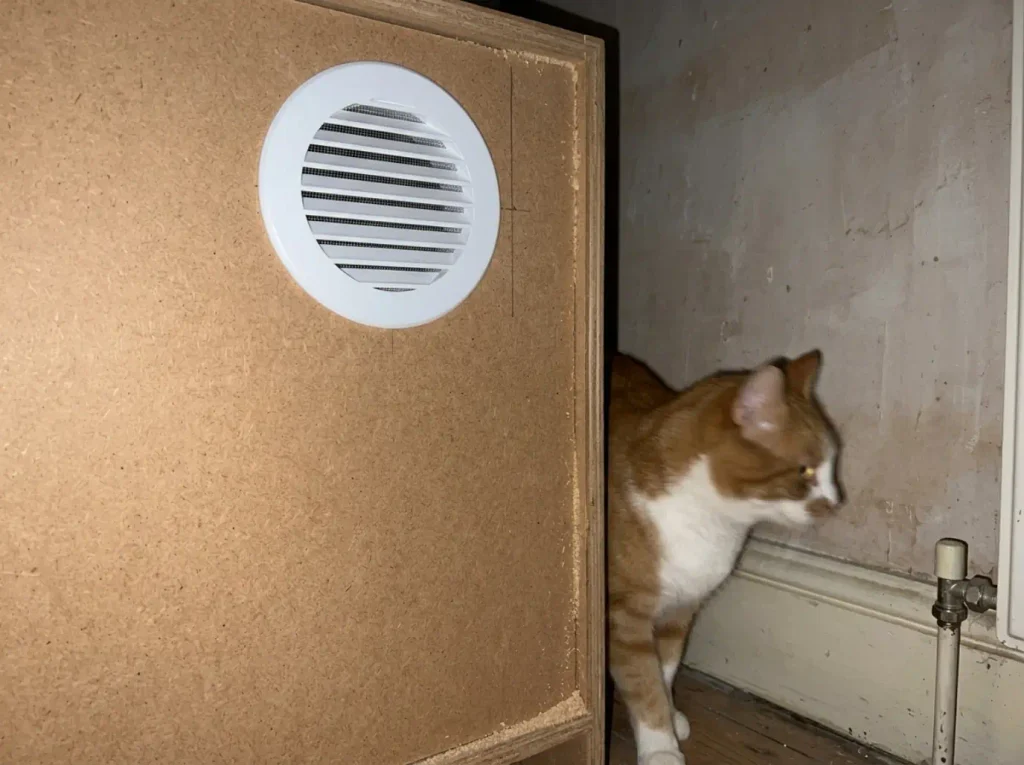
The entry hole is the cut everyone obsesses over, because it is the one you look at every day. The second cut is the one that decides whether the finished cabinet smells, and most tutorials give it half a sentence near the end of the steps, if they mention it at all. Both cuts have numbers. Only one of them has a placement rule, and it is the one nobody writes down.
Sizing the entry cutout
Eight to ten inches wide suits most cats. One documented build used 8.25 inches wide by 12 inches tall with an arched top, which is a good shape: the arch gives head clearance in the middle where the cat actually walks, without weakening the panel the way a full square opening would. Bigger is not automatically better here, because the opening is also the main path for litter to leave.
Height is where the large-breed adjustment goes. Measure at the shoulders with the cat standing, add a couple of inches, and cut to that rather than to a number from a plan drawn for a ten-pound cat. Long fur wants another inch on top of that.
Trace the opening on a cardboard offcut, cut it out with a knife, and hold the cardboard up where the cat is heading before any blade touches the panel. He will either walk through it or he will pause at the edge and reconsider, and either answer costs you a piece of cardboard instead of a cabinet. Do it twice, once at the size you planned and once an inch bigger.
The quarter-inch lip that keeps litter inside
This is the smallest number in the article and the one that changes daily life the most. The bottom edge of the entry should sit about a quarter inch above the litter box wall. Not level with it, not below it. A quarter inch above.
That lip is a wall. A digging cat throws litter sideways, and litter that hits a solid panel falls back into the box, while litter that reaches an opening at box-wall height walks straight out the door. Cut the entry so its bottom edge lands flush with the top of the tray, and you have built a chute. You will sweep the same square foot of floor every day for years and blame the cat, who has been doing exactly one thing: digging, which is what the tray is for.
Where the second cut goes, and why not beside the first
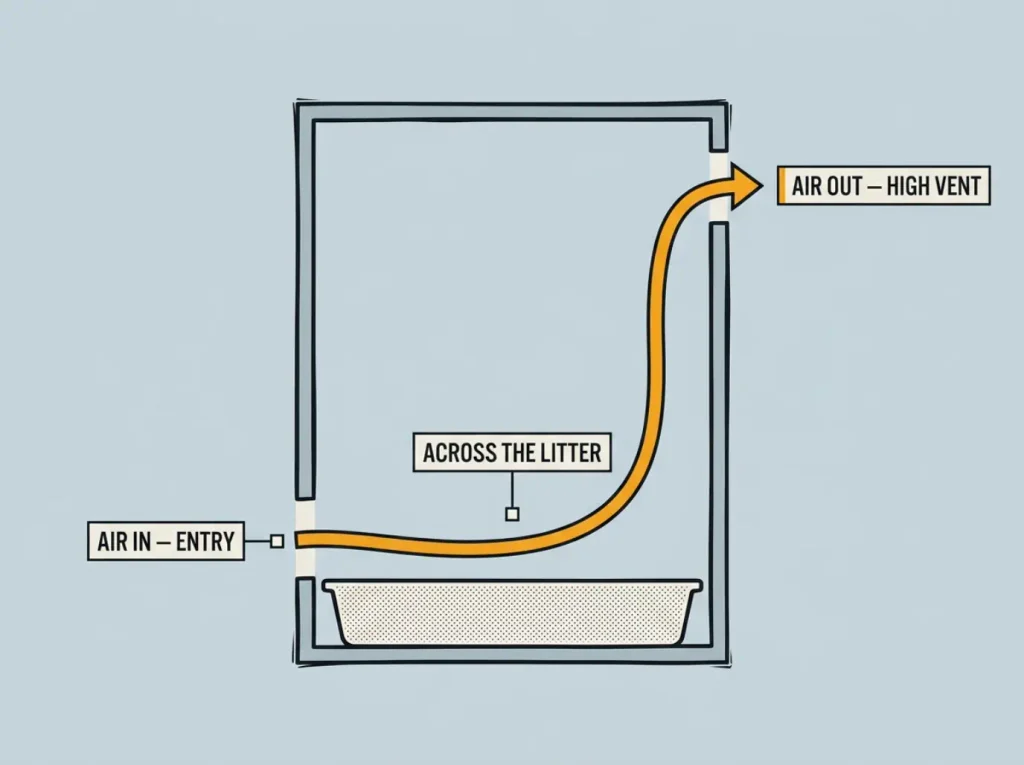
Now the rule. The second opening goes on a different plane from the first. Vent holes go on the back panel or the top, high up, not on the same wall as the entry and not beside it. Two openings on the same face do not give you a cross-draft; they give you a stagnant pocket with a slightly breezy doorway, and the only smell escape route left is the one the cat walks through. Air comes in the front, moves across the litter surface, and leaves through the back or the top, and that path only exists if the two holes are on different planes.
The reason it matters is timing, not tidiness. Ammonia buildup is not something that creeps in over days: ammonia starts about thirty minutes after the pee, not after a day, and a sealed cabinet holds it at exactly the height a cat’s nose sits when he is standing in the tray. You solved your problem and made his worse. One opening, however generously sized, is a mouth without a nose.
The documented execution is about as simple as building gets: four evenly spaced 3/4-inch spade-bit holes drilled across the back top of the cabinet, well above the tray line. Ten minutes of work. It is the same trade-off you get in furniture you buy rather than cut, except that a factory-made litter box enclosure decides the hole placement for you and a build lets you decide it yourself.
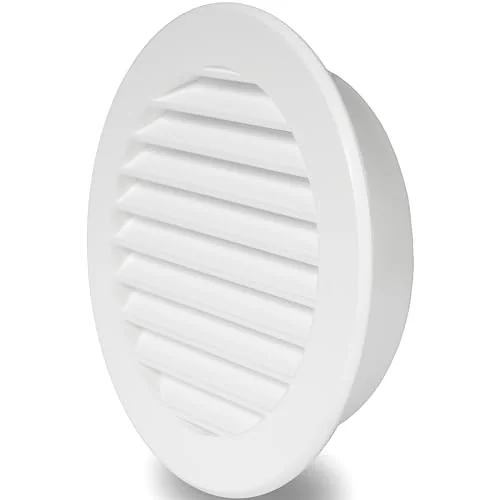
Four bare spade-bit holes work, and they cost nothing beyond the bit you already bought for the pilot holes. What they do not have is a screen, so on the day the cabinet gets vacuumed near, fine litter dust moves through them in both directions. A covered vent finishes the opening and puts mesh across it, which is the difference between a hole and a designed feature.
One Cat, Two Cats, and the Cabinet That Becomes a Bottleneck
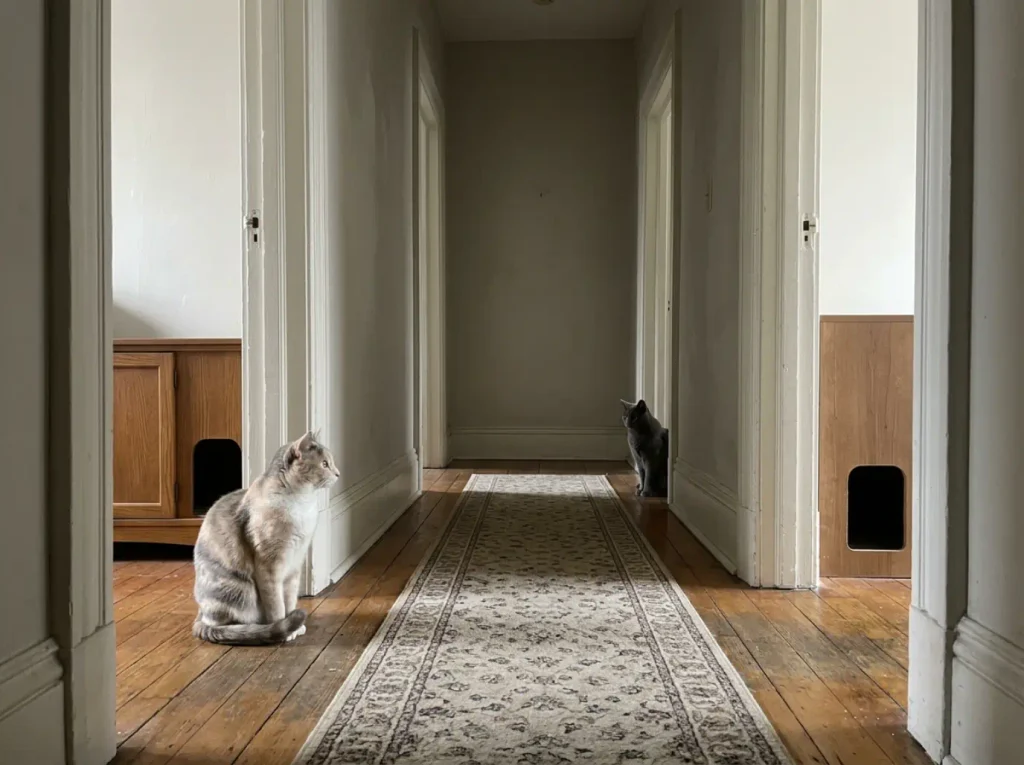
I used to think the two-cat version of this was just a wider cabinet. It is not, and the reason is worth the paragraph.
A cabinet is furniture, so people think about it the way they think about furniture. Buy the big one. Put both boxes inside. Done, and it even looks better than two separate pieces.
Cats do not read the room that way, and this is the multi-cat part of the build that no competitor in this space mentions once.
Why two boxes in one cabinet read as one
Two trays sitting side by side inside a single enclosed object are, as far as the cats are concerned, one resource in one location. Same walls, same doorway, same smell, same sightlines. The how many boxes two cats actually need math assumes those boxes are places, not trays, and a cabinet quietly collapses two places into one.
That is why a household can follow the count rule exactly and still get a cat who stops using the setup. The number was right. The geography was not. He is not being difficult about a cabinet you spent a weekend on; he is telling you there is one doorway, and one doorway means one route in and one route out, which is the arrangement cats like least.
The 40-inch number, and what it means for a real room
If you want one cabinet to genuinely house two boxes, the interior needs 40 inches or more of width. That is not a large cabinet. That is a full-size dresser, and in an apartment it is usually the piece of furniture that would otherwise hold your clothes.
At 40 inches the two trays sit far enough apart that a cat at one is not blocking the other, and there is room for a second thing that matters more than the width: a second entry. A 40-inch cabinet with one 9-inch hole in the middle is still a single doorway. Cut two, one at each end, and you have two boxes with two routes instead of one wide box with a bottleneck. Most people who go this route do not think about the second entry, and it is the cheaper half of the fix.
Building for a second cat you don’t have yet
Here is the practical version, and it is what I would tell anyone who might add a cat within a couple of years. Build the single-box cabinet you can place twice. Not the double you can only place once.
A cabinet built to the 24-inch minimum fits in a bathroom, a hallway alcove, a closet floor, under a console. One built past 40 fits against exactly one wall in most small apartment layouts, and that wall is probably already spoken for. Two modest cabinets in two rooms beat one impressive one in every way that matters to the animals using them, and if the second cat never arrives you have a spare piece of furniture instead of a piece you cannot move.
The bottleneck announces itself before it becomes a problem, if you know what you are watching for: a second cat waiting nearby while the first one is inside, or one cat quietly moving his business to a spot near the cabinet rather than in it. Neither of those is a cat problem. Both are a furniture problem with a furniture answer.
Renting, and the Build That Cuts Nothing
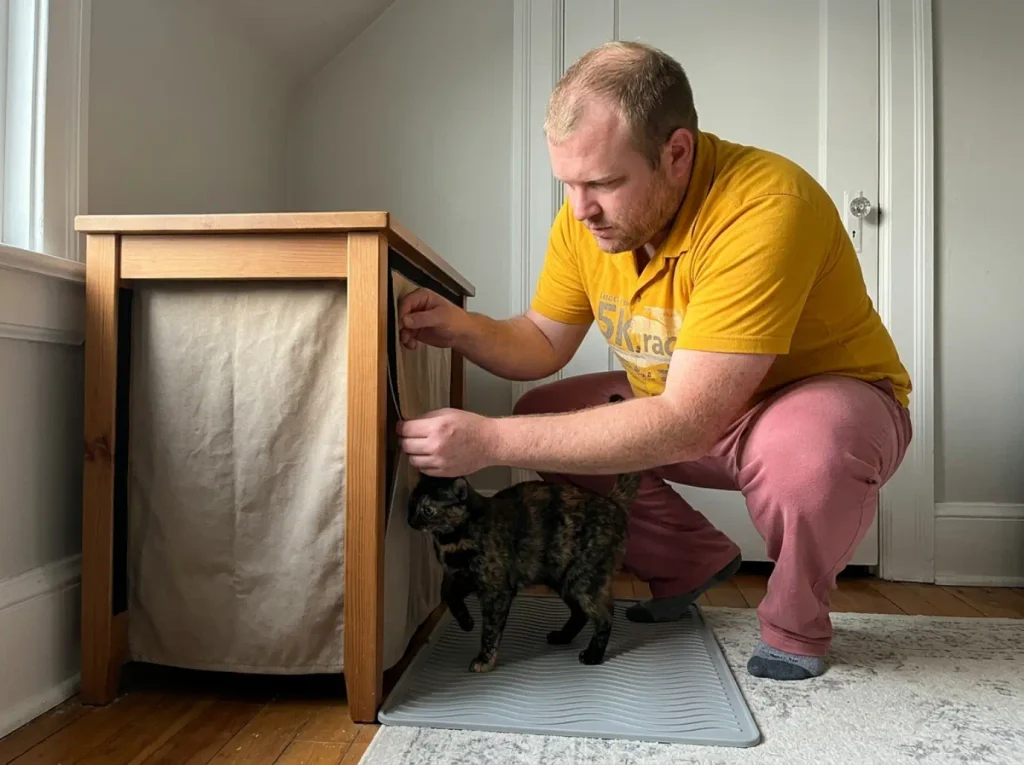
If the furniture is not yours, or the lease says nothing gets modified, you are in no-drill territory, both cut-hole builds are off the table. That does not leave you with nothing. It leaves you with a different build, fully reversible, and it comes with an advantage nobody mentions. This is also the route that assumes the same tight footprint as figuring out where the box goes when the apartment is small, so the two decisions are worth making together rather than one after the other.
The curtain build, and how it attaches
The renter-friendly default is a plain table or stand with a fabric panel around the base. Velcro along the top edge of the fabric and its mate on the underside of the tabletop, or a tension rod sprung between the legs with the fabric hung from it. The box goes underneath. Nothing gets drilled, nothing gets cut, and when you move out the table is a table again.
The quiet advantage: fabric is not airtight. The no-cut routes ventilate by default, which means the whole second-cut problem the last section spent five hundred words on does not exist here. A curtain build with a cheap table under it often smells better than a beautifully finished cabinet with one hole in the front. That is not a consolation prize. That is the physics working in your favor for once.
The trade-off is honest too. Fabric absorbs, so the panel needs washing on the same rhythm you would replace a liner, and a swinging curtain is a moving thing next to a cat trying to concentrate.
Weight the bottom hem of the fabric panel. A curtain rod sleeve sewn along the bottom with a length of dowel or flat bar inside, or a row of drapery weights, stops the panel swinging every time the cat pushes through it. A curtain that moves is a curtain that touches him on the way in and again on the way out, and that is the version cats stop using in week two.
Screens, and the version you can fold away
The second no-cut route is a screen instead of a skirt. Three panels of poster board wrapped in fabric, wallpaper or heavy wrapping paper, hinged with tape on the back, standing in a corner around the box. It costs almost nothing, it takes an evening, and it folds flat when guests need the floor.
If you would rather buy the idea than make it, freestanding privacy screens exist as a manufactured version, usually four-sided with a cat-door opening already cut. Same principle: it stands around the box rather than enclosing it structurally, so airflow is never the constraint. Either way, put the open side toward the room the cat approaches from, not tucked into a corner, because a screen with one way in has recreated the problem you were avoiding.
Finish work, and what the cabinet looks like at month three
The builder whose cabinet is four years old published an update, which is rarer than it should be. Two things had changed since the finished photo: the paint at the entry edge was scratched from repeated in-and-out use and a house move, and litter was still tracking onto the floor despite a mat added after the fact. Neither is a failure. Both were predictable, and both have a cheap fix at build time.
The entry edge is the whole story of the first one. A jigsaw leaves a chipped, slightly ragged edge exactly where the cat’s shoulders brush twice a day, and paint over an unfilled chip lifts within months. Fill it before you sand: Minwax Stainable Wood Filler works into the cut edge and the trim corners, sands flush, and takes paint or stain without a shadow. Painter’s caulk will do for hairline trim gaps, but it stays soft and it is the wrong material for an edge that gets touched.
Then paint, and on a secondhand piece the original finish is an unknown. Country Chic All-in-One Chalk Paint builds primer and topcoat into one product, which skips the separate priming step that otherwise doubles the finish work on a thrifted cabinet, and it is the closest match to the chalky paint every documented build in this category names. If there is half a can of decent paint in the garage already, use that instead and prime first. The cabinet does not know the difference and neither will anyone else.
Litter tracking is the second one, and the fix is not where people put it.
A mat outside the door catches litter that has already traveled. The PetFusion ToughGrip Waterproof Cat Litter Mat in the large size goes inside the cabinet, cut or sized to the interior footprint under and around the tray, because the litter starts moving the moment he steps out of the box and the cabinet floor is where it is landing. Any flat rubber-backed non-slip litter mat trimmed to the footprint does the same job. Doorway mats still help on top of that, and the fuller version of stopping the tracking when there’s only one spot to put the box covers the cases a mat alone will not.
Two last things, both optional. If the base seams are exposed to spray or a tipped tray, run a bead of Gorilla 100% Silicone Waterproof Caulk along them; that is an add-on, not a build step, and it belongs to a different problem covered in the two places an enclosure leaks. And once the finished cabinet is loaded and standing, put an anti-tip anchor kit, the kind Consumer Reports tests for dressers on it. Two minutes, one strap.
What to Do With All of This
Measure in the order that works, cat then box then cabinet interior, and the cut list writes itself. Measure the cabinet first and you will spend the build cutting to fit a number that was already wrong.
Cut the entry 8 to 10 inches wide with a quarter-inch lip above the box wall, and put the second cut on a different plane. Those two decisions do more for how the cabinet performs than the paint, the trim, or the hardware, and they are the two nobody photographs.
And if you rent, the fabric route is a build, not a fallback. It ventilates better than most cut cabinets do, for the simple reason that cloth cannot seal.
🗓️ Check back in three weeks, and look at three specific things. Is he going all the way in, or turning around in the doorway? Is there litter sitting on the floor at the entry every morning? Does the room smell at the end of a day with the doors shut? All three are cheap to fix at week three and expensive to fix once the paint is cured and the cabinet is loaded.
Before you buy anything at all, go measure the inside of what you already own with the doors closed. If a piece in your apartment has 40 inches in there, you already have the two-box build and the only thing standing between you and it is a jigsaw blade.
Amazon’s Audible — free for 30 days
Your cat won’t let you read. Let someone read to you.
Audible is Amazon’s audiobook library — thousands of titles, read out loud, on your phone. Free for a month, plus one audiobook to keep forever.
Frequently Asked Questions
01Is litter box furniture worth it?
It is worth it when the box has nowhere discreet to go and the alternative is leaving it out in a shared room. It is not worth it as an odor fix on its own. A cabinet with one opening concentrates smell rather than removing it, which is why the second cut matters more than the cabinet does.
02What can I use instead of a litter tray?
Nothing, in the sense the question usually means: a cabinet holds a tray, it does not replace one. What you can change is the tray itself. A plain storage tote with an opening cut in one side is the common substitute inside litter box furniture, because it gives higher walls than a standard tray for the same footprint.
03How big does the hole in litter box furniture need to be?
Eight to ten inches wide suits most cats, with the bottom edge sitting about a quarter inch above the litter box wall. A large or long-haired cat needs it wider and taller. Measure at the shoulders with him standing rather than guessing from the breed.
04Does litter box furniture need ventilation holes?
Yes, and they need to be somewhere other than next to the entry. Two openings on the same wall move air near the door and leave the rest of the interior stagnant. An opening high on the back or the top gives air a path across the litter and out.
05Can two cats share one litter box cabinet?
Only if the interior is 40 inches wide or more, and even then two cabinets in two rooms works better. Cats read boxes placed close together inside one enclosure as a single box, so a shared cabinet quietly undoes the reason for having two.
Leave a comment